Do you ever find yourself struggling with setting the right temperature in your home? Imagine being able to control your thermostat effortlessly, creating the perfect environment with just a few simple steps. In today’s fast-paced world, convenience is key, and that’s where the T6 Pro Smart Thermostat comes in.
Picture this: You walk into a cozy, perfectly heated home without lifting a finger. With the T6 Pro Smart Thermostat installation, achieving comfort has never been easier. Say goodbye to manual adjustments and hello to a smart, efficient solution that adapts to your lifestyle.
In this article, we’ll guide you through the seamless installation process of the T6 Pro Smart Thermostat, empowering you to take control of your home’s climate with ease. Get ready to experience a new level of comfort and convenience at your fingertips.
Key Takeaways
- T6 Pro Smart Thermostat offers modern convenience with features like Wi-Fi connectivity, adaptive learning, programmable settings, and geofencing technology.
- Installation steps involve turning off power, removing the old thermostat, installing the new thermostat, and connecting it to Wi-Fi for remote access.
- Benefits include energy savings, convenience, customization, and compatibility with a variety of HVAC systems.
- Check HVAC system compatibility and system requirements, such as reliable Wi-Fi connection, C-wire, and compatibility with the Honeywell Home App, before installation.
- Follow a step-by-step guide for installing the T6 Pro Smart Thermostat, ensuring compatibility, gathering required tools, turning off power, mounting, connecting wires, powering up, and customizing settings.
- Troubleshooting tips cover issues like no power to the thermostat, incorrect temperature readings, Wi-Fi connection problems, and functionality concerns, offering solutions for a smooth installation process.
Overview of the T6 Pro Smart Thermostat
The T6 Pro Smart Thermostat offers modern convenience and comfort by allowing you to easily control the temperature in your home. This smart device streamlines your heating and cooling systems, adapting to your lifestyle for optimal comfort and energy efficiency.
Features of the T6 Pro Smart Thermostat
- Wi-Fi Connectivity: The T6 Pro Smart Thermostat connects to your home’s Wi-Fi network, enabling you to control the temperature remotely using your smartphone or other smart devices.
- Adaptive Learning: This thermostat learns your preferred heating and cooling patterns over time, adjusting automatically to optimize comfort while saving energy.
- Programmable Settings: You can create custom schedules for different times of the day, ensuring that your home is always at the right temperature when you need it.
- Geofencing Technology: The T6 Pro uses geofencing to detect when you’re home or away, adjusting the temperature accordingly to save energy when you’re not there.
Installation Steps for the T6 Pro Smart Thermostat
- Turn Off Power: Before starting the installation process, make sure to turn off the power to your HVAC system at the breaker box to ensure safety.
- Remove Old Thermostat: Take out your existing thermostat carefully, noting where each wire is connected for reference during the installation of the new T6 Pro device.
- Install the New Thermostat: Follow the manufacturer’s instructions provided with the T6 Pro Smart Thermostat for a step-by-step guide on connecting the wires and mounting the device to your wall.
- Connect to Wi-Fi: Once the physical installation is complete, connect the T6 Pro to your home’s Wi-Fi network to enable remote access and control through the accompanying app.
- Energy Savings: By intelligently adjusting the temperature based on your habits and the home’s occupancy, the T6 Pro helps you save on energy costs.
- Convenience: Control your home’s climate from anywhere using your smartphone, ensuring you always return to a comfortable environment.
- Customization: With programmable schedules and adaptive learning, the T6 Pro provides personalized comfort tailored to your preferences.
- Compatibility: The T6 Pro Smart Thermostat is compatible with most HVAC systems, making it a versatile choice for many homes.
Compatible Systems and Requirements
To ensure seamless integration and optimal performance of your T6 Pro Smart Thermostat, it’s essential to be aware of the compatible heating, ventilation, and air conditioning (HVAC) systems and system requirements. Here’s what you need to know:
Recommended Products

· Not Compatible: Two transformer systems, Conventional multi-stage systems, Dual fuel/hybrid heating, Electric baseboard heat (110-240 volts), Line voltage, Convectors, Radiant-ceiling heat, Mini split systems and 12V RV systems.

Heat pump thermostat for home, non programmable, 2 heating and 1 cooling, electric or gas/oil configurable. (TIP: before purchasing, check to see if this thermostat is compatible with your old thermostat)

Before buying, please confirm whether the product is compatible with your system, and check the size of the product to see if it can cover the traces left on the wall of the old thermostat.
HVAC System Compatibility
When installing your T6 Pro Smart Thermostat, it’s crucial to check whether it’s compatible with your current HVAC system. The T6 Pro works effectively with most 24-volt heating and cooling systems, including:
- Gas, oil, or electric systems
- Heat pumps
- Forced air systems
- Hot water systems with or without a pump
- Steam systems
- 750-millivolt systems
Ensure your HVAC system falls within these categories to guarantee a successful installation and operation of the T6 Pro Smart Thermostat.
System Requirements
Alongside the HVAC system compatibility, there are specific system requirements you should consider before installing your T6 Pro Smart Thermostat. These requirements include:
- A reliable Wi-Fi connection: To benefit from remote access and control features, such as adjusting temperatures while away from home, you need a stable Wi-Fi network.
- A C-wire or common wire: While the T6 Pro can operate without a C-wire using a power-stealing feature, it’s recommended to have a C-wire for consistent power supply and optimal performance.
- Compatibility with the Honeywell Home App: To fully utilize all the smart features of your T6 Pro Smart Thermostat, ensure compatibility with the Honeywell Home App on your iOS or Android device.
- Proper wall mounting: Install the T6 Pro Smart Thermostat on a clean, flat wall surface where it can easily detect room temperature.
By verifying HVAC system compatibility and meeting the system requirements, you’ll be on your way to enjoying the convenience, energy savings, and personalized climate control offered by the T6 Pro Smart Thermostat.
Step-by-Step Guide for Installing the T6 Pro Smart Thermostat
Ensure Compatibility with Your HVAC System
To start installing your T6 Pro Smart Thermostat, verify that it’s compatible with your HVAC system. Check if your system supports the T6 Pro model to ensure proper functionality.
Gather Required Tools
Before beginning the installation, gather the necessary tools: a screwdriver, wire cutter/stripper, and possibly a power drill for mounting if needed.
Turn Off Power
Safety first! Turn off the power to your HVAC system to prevent any accidents or damage during the installation process.
Remove Existing Thermostat
Next, remove your old thermostat carefully. Remember to take note of the wire labels to make connecting the new T6 Pro easier.
Mounting the T6 Pro
Mount the T6 Pro thermostat on the wall using the provided mounting plate. Make sure it’s securely fixed to the wall.
Connect the Wires
Connect the labeled wires from your HVAC system to the corresponding terminals on the T6 Pro thermostat. Follow the wiring diagram in the manual for guidance.
Power Up
Turn the power back on and follow the on-screen instructions to set up your T6 Pro Smart Thermostat. Connect it to your Wi-Fi network for remote access and control.
Final Touches
After completing the setup, customize your thermostat settings according to your preferences. Set your heating and cooling schedules to maximize energy efficiency and comfort.
Enjoy Smart Temperature Control
Congratulations! You’ve successfully installed your T6 Pro Smart Thermostat. Benefit from its smart features like adaptive learning and geofencing for a comfortable and energy-efficient home.
Troubleshooting Common Installation Issues
When installing your T6 Pro Smart Thermostat, you may encounter some common issues that can be easily resolved. Here are a few troubleshooting tips to help you address potential challenges and ensure a smooth installation process:
Recommended Products
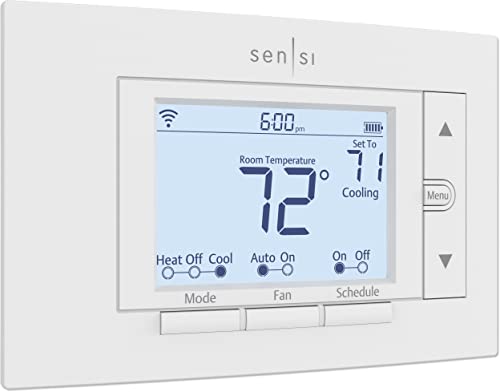
PRIVACY PROTECTION*: Sensi won’t sell your personal information to third parties

COMFORT COMES IN YOUR COLOR. Personalize your Wi-Fi Smart Color Programmable Thermostat to fit your décor.

High use of the scheduling feature of the T5 thermostat saved customers between 8 and 16% on heating and cooling bills. Dollar savings range based on nationwide average annual single-family detached home's heat and cooling bills; actual savings varies based on consumption.
No Power to the Thermostat
If you find that your T6 Pro Thermostat isn’t receiving power:
- Check the power source: Ensure that the power switch on your HVAC system is turned on.
- Inspect the wiring: Make sure the thermostat wires are securely connected to the terminals following the wiring diagram in the manual.
- Check circuit breakers: Verify that the circuit breaker for your HVAC system is not tripped.
Incorrect Temperature Readings
In case your thermostat displays incorrect temperature readings:
- Calibrate the thermostat: Follow the calibration instructions in the user manual to adjust the temperature readings accurately.
- Check for placement issues: Ensure that the thermostat is not exposed to direct sunlight, drafts, or near heat sources, which can affect temperature accuracy.
Wi-Fi Connection Problems
If you’re experiencing issues with connecting your thermostat to Wi-Fi:
- Check network settings: Ensure that you’re entering the correct Wi-Fi network name and password.
- Signal strength: Verify that the thermostat is within the range of your Wi-Fi router for a stable connection.
- Restart the thermostat: Try restarting the thermostat and reconnecting it to your Wi-Fi network.
Functionality Concerns
If certain features of the thermostat are not working as expected:
- Factory reset: Consider performing a factory reset on the thermostat to troubleshoot software glitches.
- Update firmware: Check for any available firmware updates for your thermostat to ensure optimal performance.
Conclusion
You’ve now explored the world of the T6 Pro Smart Thermostat installation. From its innovative features to the step-by-step setup process, you’re well-equipped to enhance your home temperature control. By addressing common installation challenges and providing troubleshooting tips, you’re ready to tackle any issues that may arise. Enjoy the convenience and comfort this smart thermostat brings to your daily life. Happy installing!
Frequently Asked Questions
1. What are the key features of the T6 Pro Smart Thermostat?
The T6 Pro Smart Thermostat offers Wi-Fi connectivity, adaptive learning, programmable settings, and geofencing technology for convenient and precise home temperature control.
2. What is highlighted in the installation process of the T6 Pro Smart Thermostat?
The installation process emphasizes compatibility with the HVAC system, safety measures, wiring connection, and customization to ensure seamless integration and optimal performance.
3. What common installation issues are addressed in the article?
The article provides troubleshooting tips for power supply issues, temperature inaccuracies, Wi-Fi connectivity problems, and functionality concerns to assist readers in overcoming common challenges during installation.