Ever wondered if you could upgrade to a smart thermostat with just 2 wires? Picture this: you’re eager to embrace the convenience of a smart home, but your thermostat setup seems to limit your options. Fret not, as we’re here to guide you through the process of installing a smart thermostat with only 2 wires.
Key Takeaways
- Smart thermostats with 2-wire compatibility are designed for older systems without a common C-wire, offering advanced features with minimal wiring requirements.
- Installing a smart thermostat with 2 wires involves steps like turning off power, identifying and connecting wires, and securely mounting the thermostat.
- These 2-wire smart thermostats provide simplicity and cost-effectiveness, making them suitable for DIY installation with detailed instructions.
- Understanding the limitations, like potential features and power dependency issues, of smart thermostats without a C-wire is essential for informed decision-making.
- Compatibility checks, professional assistance if unsure, and attention to detail during installation are crucial for ensuring a successful upgrade to a smart thermostat with only 2 wires.
Understanding Smart Thermostats
When it comes to smart thermostats, understanding how they function with just two wires is crucial.
Key Components:
- Smart Thermostat: This device connects to your HVAC system to control heating and cooling based on programmed settings and real-time data.
- Wires: In a 2-wire setup, one wire is for powering the thermostat, while the other is for signaling the heating or cooling system.
Compatibility:
Smart thermostats with 2-wire compatibility are designed to work efficiently with older systems that lack the common C-wire.
Functionality:
These smart thermostats utilize advanced algorithms to manage temperature settings with minimal wiring requirements, making them ideal for older homes.
Installation Process:
- Turn Off Power: Before beginning, make sure to turn off the power to your HVAC system to prevent any accidents.
- Identify Wires: Locate the two wires connected to your existing thermostat. Typically, one wire is Rh/R and the other is W/W1.
- Connect the Wires: Connect the Rh/R wire to the Rc terminal and the W/W1 wire to the W terminal on your smart thermostat.
- Finish Installation: Once the wires are securely connected, you can proceed with attaching the smart thermostat to the wall mount and restoring power to the HVAC system.
Benefits of 2-Wire Smart Thermostats:
- Simplicity: Installation is straightforward, requiring minimal wiring knowledge.
- Cost-Effective: These thermostats offer smart features without the need for a C-wire installation.
- Will a 2-wire smart thermostat work with my HVAC system? Yes, these thermostats are designed to work efficiently with 2-wire setups.
- Do I need professional help to install a smart thermostat with 2 wires? While professional installation is recommended, many smart thermostats come with detailed instructions for DIY installation.
Understanding the nuances of smart thermostats with two wires empowers you to upgrade your home’s temperature control system efficiently and effectively.
Compatibility of Smart Thermostat with 2 Wires
When it comes to the compatibility of a smart thermostat with only 2 wires, it’s essential to ensure that your system can support the functionality of a modern thermostat. Here, we’ll discuss how to determine if your HVAC system is compatible with a smart thermostat that requires just two wires.
Recommended Products

CUSTOMIZE: Choose to receive change air filter reminders and select display settings to optimize this thermostat for home.The RTH20B is a direct replacement for the RTH2300, and replacement for the RTH221 offering 5-2 scheduling
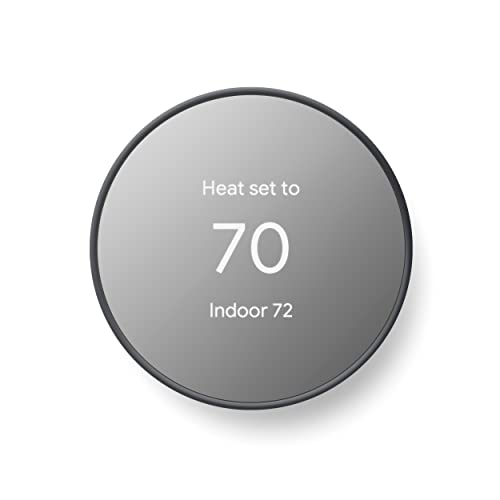
ENERGY STAR certified smart thermostat for home that helps you save energy and stay comfortable.Connectivity : Wi-Fi - 802.11b/g/n 2.4 GHz, 802.11a/n 5 GHz Wi-Fi., Wireless interconnect : Bluetooth Low Energy Please refer to the product description section below for all applicable legal disclaimers.Product note: You can also check your system’s compatibility before purchasing a Nest thermostat with our online Nest Compatibility Checker on the Google Nest support page

Compatible with series 3 & Series 4 T9 Smart thermostats. Series number appears after model number on sticker on back of thermostat
Check Your HVAC System Compatibility
To begin, you should verify if your heating and cooling system is compatible with a 2-wire smart thermostat. Most older systems lack a C-wire, which is typically required by newer smart thermostats to function efficiently. Follow these steps to confirm compatibility:
- Identify Your Current Wiring: Check the existing wiring in your thermostat setup. Look for two labeled wires usually connected to the R and W terminals.
- Check System Compatibility: Older systems with just two wires may not support advanced functions like Wi-Fi connectivity and programming. Confirm if your HVAC system is compatible with a 2-wire thermostat by referring to the manufacturer’s guidelines.
- Consult a Professional: If you’re uncertain about your system’s compatibility or wiring configuration, it’s advisable to seek assistance from a qualified HVAC technician. They can assess your system and recommend suitable thermostat options.
Understanding Smart Thermostat Limitations
While 2-wire smart thermostats offer simplicity and cost-effectiveness, they may have limitations compared to models that require a C-wire. Consider the following aspects before choosing a smart thermostat for your system:
- Limited Features: Smart thermostats without a C-wire may not support all advanced features, such as continuous power for a Wi-Fi connection or complex scheduling capabilities.
- Potential Compatibility Issues: Some smart thermostats rely on a C-wire to operate efficiently and prevent power loss during HVAC system operation.
- Battery Dependence: Thermostats without a C-wire may rely on battery power, leading to issues if the batteries run out or are not replaced regularly.
By understanding these limitations, you can make an informed decision when selecting a smart thermostat for your 2-wire system.
Knowing the compatibility of a smart thermostat with 2 wires is crucial to ensure a successful upgrade without compromising on essential features. By following these guidelines and seeking professional advice if needed, you can enjoy the benefits of a smart thermostat tailored to your HVAC system’s requirements.
Steps to Install a Smart Thermostat with 2 Wires
Now that you understand the compatibility and considerations for smart thermostats with only 2 wires, let’s dive into the steps to successfully install one. Follow these straightforward instructions to upgrade your thermostat efficiently:
Step 1: Turn Off Power
Begin by turning off the power to your heating and cooling system at the breaker. This step is crucial to ensure your safety during the installation process.
Step 2: Remove Existing Thermostat
Carefully detach your current thermostat from the wall. Take note of the existing wires and their corresponding labels, if any, to assist you later in the installation.
Step 3: Identify Wires
Identify the two wires connected to your existing thermostat. In most cases, these wires are typically labeled as R (power) and W (heat).
Step 4: Connect New Smart Thermostat
Connect the corresponding wires to your new smart thermostat. Most 2-wire systems will require you to connect the R wire to the R terminal and the W wire to the W terminal on the new thermostat.
Step 5: Attach Thermostat to Wall
Securely attach the new smart thermostat to the wall using the provided mounting plate and screws. Make sure it is level for accurate temperature readings.
Step 6: Power Up and Program
Turn the power back on at the breaker and follow the manufacturer’s instructions to program your new smart thermostat. Set your desired temperature settings and schedule to maximize energy efficiency.
Step 7: Test the System
Once programmed, test your heating and cooling system to ensure the thermostat is functioning correctly. Monitor the temperature changes to confirm that the smart thermostat is controlling your HVAC system effectively.
By following these steps, you can successfully install a smart thermostat with only 2 wires, enhancing your home’s comfort and energy efficiency without the need for additional wiring.
Troubleshooting Tips for Installation Issues
If you encounter any issues during the installation process of your smart thermostat with only 2 wires, don’t worry, as we have some troubleshooting tips to help you overcome common challenges.
- Check Power Supply:
- Ensure that the power to your HVAC system is off before starting the installation. You can do this by turning off the circuit breaker that controls your heating and cooling system.
- Double-Check Wiring:
- Verify that the 2 wires from your old thermostat are correctly connected to the corresponding terminals on your new smart thermostat. Make sure there are no loose connections or exposed wires.
- Inspect Compatibility:
- Confirm that your smart thermostat is compatible with a 2-wire system. Check the manufacturer’s guide or website for compatibility information to avoid any compatibility issues.
- Reset the Thermostat:
- If you’re facing connectivity or functionality issues after installation, try resetting your smart thermostat. Refer to the manufacturer’s instructions on how to reset the device.
- Calibrate Temperature Settings:
- Calibrate the temperature settings on your smart thermostat to ensure accurate readings and optimal performance. Incorrect temperature readings can lead to system malfunctions.
- Network Connection:
- If your smart thermostat requires a network connection for full functionality, ensure that your Wi-Fi network is stable and that the thermostat is within range of the network.
- Professional Assistance:
- If you’ve followed all the installation steps and troubleshooting tips but are still experiencing issues, consider seeking help from a professional HVAC technician. They can diagnose and rectify any underlying problems.
Remember, the key to a successful installation is attention to detail and following the manufacturer’s instructions closely. By troubleshooting any issues that arise, you can enjoy the convenience and energy savings that come with a smart thermostat in your home.
Recommended Products

The C-Wire Adapter takes the wires from the thermostat and provides a bridge to the equipment so there is no need to run new wires to power the thermostat.

Note: Attention Before Purchasing! This adapter is only compatible with 24VAC systems without a C-Wire. Please confirm whether your equipment requires this C-Wire adapter before purchasing! Not compatible with Dual transformer, Not for Fan coil, Not for Communicating unit

WIDELY USE: US power cable Powers your popular smart thermostats((Nest 1st/2nd, Ecobee, Honeywell, Sensi) and doorbells(Ring Video Doorbell, Ring Video Doorbell 2 & Ring Video Doorbell Pro,Nest Skybell , etc.) and other devices that require constant AC 24 volt power for operation, enables you to charge your devices safely.
Conclusion
Installing a smart thermostat with only 2 wires can seem daunting, but with the right guidance, it’s a manageable task. By following the steps outlined in this article, you can upgrade your system without the need for additional wiring. Remember, attention to detail is key to a successful installation. Troubleshooting any issues that may arise will ensure that your smart thermostat functions optimally. Enjoy the convenience and energy savings that come with your new smart thermostat!
Frequently Asked Questions
Can I upgrade to a smart thermostat with only 2 wires in my system?
Yes, you can upgrade to a smart thermostat with just 2 wires. Ensure compatibility with your HVAC system before purchasing. Follow the manufacturer’s instructions closely during installation for a successful upgrade.
What are some common troubleshooting tips for smart thermostat installation issues?
Troubleshooting tips include checking the power supply, verifying wiring connections, confirming compatibility, resetting the thermostat, calibrating temperature settings, ensuring network connection, and seeking professional assistance if needed.
Why is attention to detail important during smart thermostat installation?
Attention to detail is crucial to ensure a successful installation. Following manufacturer instructions closely and checking compatibility will help you enjoy the convenience and energy savings of a smart thermostat.