Ever found yourself wanting to stream your favorite music on your Amazon Echo, only to be thwarted by a weak Wi-Fi signal? Imagine being able to enjoy your tunes hassle-free, no matter where you are in your home. What if we told you there’s a simple solution to ensure uninterrupted connectivity for your Amazon Echo?
Picture this: You’re hosting a gathering in your backyard, eager to use your Echo to set the perfect ambiance with music, but your Wi-Fi just isn’t cutting it. Fret not, as we’ve got you covered with a quick and easy way to connect your Amazon Echo to a hotspot.
In this article, we’ll walk you through the steps to seamlessly link your Amazon Echo to a hotspot, granting you the freedom to enjoy music and smart features without the limitations of a weak Wi-Fi signal. Get ready to unlock the full potential of your Amazon Echo with this straightforward guide.
Key Takeaways
- Understanding how to connect your Amazon Echo to a hotspot is essential for uninterrupted connectivity.
- Use the Alexa app to establish and configure the connection between your Echo and the hotspot.
- Verify successful connectivity by checking the indicator light on your Echo and testing the device with Alexa commands.
- Troubleshooting tips include ensuring signal strength, correct password entry, and device proximity for optimal connectivity.
- Follow a step-by-step process to connect your Amazon Echo to a hotspot using the Alexa app on your smartphone.
- Best practices for maintaining a stable hotspot connection include optimal signal strength, compatibility checks, regular device restarts, and software updates.
Understanding Amazon Echo Hotspot Connectivity
To ensure uninterrupted connectivity for your Amazon Echo, understanding how to connect it to a hotspot is essential. Here’s a breakdown of the process to seamlessly link your device and enjoy your favorite music and smart features without being hindered by a weak Wi-Fi signal.
Establishing Hotspot Connectivity
When setting up your Amazon Echo with a hotspot, you need to access the Alexa app on your smartphone:
- Open the Alexa App: Launch the Alexa app on your smartphone.
- Select Devices: Tap on the Devices icon located in the lower right corner.
- Choose Echo & Alexa: Select your Echo device from the list.
- Select Network: Tap on the Change button next to the Wi-Fi Network.
- Choose Hotspot: Select the hotspot you want to connect your Echo to.
Configuring Hotspot Settings
After selecting the hotspot network, follow these steps to configure the connection:
- Enter Hotspot Password: Input the password for the chosen hotspot network.
- Connect Echo: Wait for your Amazon Echo to establish a connection with the hotspot.
Verifying Connection
To ensure successful connectivity, verify that your Amazon Echo is successfully linked to the hotspot:
- Check Indicator Light: Look for the indicator light on your Echo device. A solid blue light indicates a successful connection.
- Test Device: Test the connection by asking Alexa a question or giving a command.
Troubleshooting Tips
If you encounter any issues during the hotspot setup, here are a few troubleshooting tips:
- Signal Strength: Ensure the hotspot signal is strong enough for a stable connection.
- Correct Password Entry: Double-check the password entered for the hotspot network.
- Device Proximity: Keep your Echo device close to the hotspot for optimal connectivity.
By following these steps and troubleshooting tips, you can easily connect your Amazon Echo to a hotspot, providing you with a reliable alternative for seamless smart home experiences.
Steps to Connect Amazon Echo to a Hotspot
Recommended Products
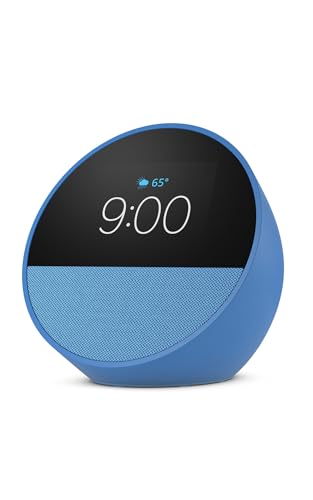
MEET ECHO SPOT - A sleek smart alarm clock with Alexa and big vibrant sound. Ready to help you wake up, wind down, and so much more.
Open Alexa App on Your Smartphone
When you’re ready to link your Amazon Echo to a hotspot, begin by launching the Alexa app on your smartphone.
Access Device Settings
In the Alexa app, navigate to the device settings to proceed with connecting your Amazon Echo to a hotspot.
Choose Your Amazon Echo Device
Select the specific Amazon Echo device you want to connect to the hotspot from the list displayed in the device settings.
Select Network Settings
Within the device settings, locate and click on the “Network” or “Wi-Fi” option to reveal the available network settings.
Connect to a Hotspot
Look for the network name of your hotspot in the list of available networks and choose it to initiate the connection process.
Enter Hotspot Password
If required, input the password for your hotspot network to authenticate and establish a secure connection between your Amazon Echo and the hotspot.
Verify Connection
After entering the password, your Amazon Echo will attempt to join the hotspot network. Once successfully connected, you’ll receive a confirmation message.
Test Connectivity
To ensure a smooth connection, test the connectivity by asking Alexa to perform a simple task, like playing a song or providing a weather update.
Troubleshooting Tips
If you encounter any issues during the setup process or experience connectivity problems, consider restarting the Alexa app, smartphone, and Amazon Echo. Additionally, verify that the hotspot signal is strong and the password is correct.
By following these straightforward steps, you can seamlessly connect your Amazon Echo to a hotspot, allowing you to enjoy uninterrupted smart features and music streaming without Wi-Fi constraints.
Troubleshooting Tips for Hotspot Connection Issues
When connecting your Amazon Echo to a hotspot, occasional issues might arise. Here are some troubleshooting tips to help you resolve common connectivity problems.
1. Check Hotspot Signal Strength
Ensure that the hotspot signal is strong enough for your Amazon Echo to connect. Move closer to the hotspot or reposition the device for a better signal reception.
2. Confirm Hotspot Compatibility
Ensure that your hotspot network is compatible with the Amazon Echo. Some networks may require additional settings or might not support certain devices.
3. Restart your Amazon Echo
Try restarting your Amazon Echo device by unplugging it from the power source, waiting for a few seconds, and plugging it back in. This simple step can often resolve connectivity issues.
4. Reset Network Settings
In the Amazon Echo settings, you can reset network settings to clear any previous configurations that might be causing connection problems. Re-enter your hotspot details after resetting the network settings.
5. Update Software
Make sure your Amazon Echo device and the Alexa app are running the latest software versions. Outdated software can sometimes lead to compatibility issues with your hotspot connection.
6. Disable Band Steering
If your hotspot uses band steering to switch between 2.4GHz and 5GHz bands, disable this feature temporarily. Some devices may have trouble connecting when band steering is enabled.
7. Forget Network and Reconnect
In the Amazon Echo settings, forget the existing hotspot network and reconnect by entering the network details again. This can help in establishing a fresh connection.
8. Contact Hotspot Provider
If the issue persists, reach out to your hotspot provider for assistance. They might be able to troubleshoot network-specific problems or provide further guidance on connecting your Amazon Echo.
By following these troubleshooting tips, you can overcome hotspot connection issues and enjoy uninterrupted use of your Amazon Echo for smart features and music streaming.
Best Practices for Maintaining a Stable Hotspot Connection
To ensure a stable connection between your Amazon Echo and hotspot, follow these best practices:
- Optimal Signal Strength: Place your Amazon Echo within a reasonable range of your hotspot to maintain a strong signal.
- Compatibility Check: Verify that your Amazon Echo model is compatible with the hotspot network for seamless connectivity.
- Regular Device Restarts: Periodically restart your Amazon Echo to refresh the connection and prevent potential glitches.
- Network Settings Reset: If facing persistent connectivity issues, consider resetting the network settings on your Amazon Echo to troubleshoot.
- Software Updates: Keep your Amazon Echo software up to date to benefit from the latest improvements and bug fixes that could enhance connectivity.
- Disable Band Steering: If your hotspot uses band steering, disable this feature as it may cause connection interruptions with some devices like the Amazon Echo.
- Forget and Reconnect: If experiencing connectivity issues, try forgetting the hotspot network on your Amazon Echo and then reconnecting to establish a fresh connection.
By adhering to these best practices, you can maintain a stable connection between your Amazon Echo and the hotspot, ensuring uninterrupted access to its smart features.
Conclusion
You’ve now learned how to seamlessly connect your Amazon Echo to a hotspot for uninterrupted music streaming. By following the step-by-step guide and implementing the troubleshooting tips provided, you can ensure a stable connection. Remember to maintain optimal signal strength, check compatibility, and perform regular device restarts. Updating software, disabling band steering, and reconnecting to the network when needed are also key practices to enhance your Echo experience. With these strategies in place, you can enjoy all the smart features of your Amazon Echo without worrying about Wi-Fi limitations. Happy streaming!
Frequently Asked Questions
How can I connect my Amazon Echo to a hotspot?
To connect your Amazon Echo to a hotspot, open the Alexa app, go to Settings > Network > Add New Device. Follow the instructions to connect your Echo to the hotspot network.
What should I do if my Amazon Echo doesn’t connect to the hotspot?
If your Amazon Echo doesn’t connect to the hotspot, ensure that the hotspot signal is strong, verify compatibility with your device, restart the Echo, reset network settings, update the software, disable band steering on the hotspot, or forget and reconnect the hotspot network.
Why is it important to maintain a stable hotspot connection?
Maintaining a stable hotspot connection ensures uninterrupted music streaming and seamless operation of smart features on your Amazon Echo device. Following best practices can help avoid connectivity issues and enhance the user experience.