Are you tired of coming home to a freezing or sweltering house because your thermostat isn’t set right? Picture this: You walk in after a long day, hoping for comfort, only to find the temperature off-kilter. What if you could control it from anywhere, ensuring a cozy welcome every time?
In this article, I’ll show you how to install your smart thermostat effortlessly. No more guesswork or discomfort; just a simple step-by-step guide to transform your home into a haven of perfect temperatures. Get ready to enjoy the convenience and energy savings that come with a smart thermostat installation.
Key Takeaways
- Smart thermostats offer remote temperature control, energy efficiency, convenience, integration with smart home systems, learning capabilities, reports, and voice control.
- Prior to installation, check compatibility, ensure a stable Wi-Fi connection, gather necessary tools, label thermostat wires, turn off power, and prepare the mounting area.
- Installation steps include switching off power, removing the old thermostat, installing the mounting plate, connecting wires, attaching the new thermostat, powering up and testing, and downloading the companion app.
- Troubleshoot common installation issues like Wi-Fi connectivity problems, compatibility errors, wiring issues, error messages, and power interruptions.
- Maintain your smart thermostat by performing regular maintenance checks, updating software, replacing batteries when needed, checking sensor calibration, ensuring a stable Wi-Fi connection, and considering professional maintenance.
Overview of Smart Thermostats
When it comes to smart thermostats, it’s essential to understand their basic functions and benefits. Here’s a breakdown to give you a clear overview:
- Remote Temperature Control: Smart thermostats allow you to adjust the temperature of your home from anywhere using your smartphone or other devices.
- Energy Efficiency: These devices help you save on energy costs by learning your heating and cooling patterns and optimizing usage.
- Convenience: With a smart thermostat, you can create personalized schedules based on your routine, ensuring that your home is always at the desired temperature.
- Integration with Smart Home Systems: Many smart thermostats can integrate with other smart devices in your home, offering a seamless connected experience.
- Learning Capabilities: Some models have the ability to learn your preferences over time, automatically adjusting settings to enhance comfort and efficiency.
- Reports and Insights: Smart thermostats provide detailed reports on energy usage, making it easier for you to monitor and manage your consumption.
- Voice Control: Certain models are compatible with voice assistants like Alexa or Google Assistant, allowing for hands-free operation.
When considering installing a smart thermostat, it’s vital to choose one that aligns with your needs and home setup. Keep these key points in mind as you explore the options available.
Pre-Installation Preparations
Before diving into the installation process of your smart thermostat, there are a few essential preparations you need to make. These steps ensure a smooth and successful installation, setting the stage for efficient operation of your new device.
Recommended Products

CONTROL: Connect to WiFi and control from anywhere using the First Alert app - Matter Certified and also compatible with Amazon Alexa, Google Assistant, Apple Home Kit. C-WIRE Required: Before purchasing, please check to see if this thermostat is compatible with your home, a C-wire power adapter may be needed for proper operation of this thermostat.
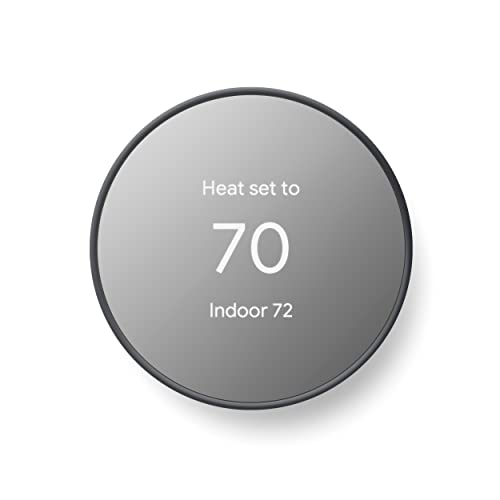
ENERGY STAR certified smart thermostat for home that helps you save energy and stay comfortable.Connectivity : Wi-Fi - 802.11b/g/n 2.4 GHz, 802.11a/n 5 GHz Wi-Fi., Wireless interconnect : Bluetooth Low Energy Please refer to the product description section below for all applicable legal disclaimers.Product note: You can also check your system’s compatibility before purchasing a Nest thermostat with our online Nest Compatibility Checker on the Google Nest support page

Save up to 26% per year on heating and cooling costs. ENERGY STAR certified. Included SmartSensor (50 dollar value) prompts your thermostat to make temperature adjustments ensuring comfort. Compared to a hold of 72°F/22°C
Check Compatibility
The first crucial step is to check the compatibility of your current HVAC system with the smart thermostat you’ve purchased. Most smart thermostats are designed to work with a wide range of heating and cooling systems, but it’s always wise to confirm this before proceeding. Consult the thermostat’s manual or the manufacturer’s website for compatibility information.
Ensure a Stable Wi-Fi Connection
Since smart thermostats rely on a Wi-Fi connection for remote access and control, it’s imperative to ensure that your home’s Wi-Fi network is stable and reliable. A strong internet connection is essential for the thermostat to communicate with your smartphone or other connected devices effectively.
Gather Necessary Tools
Gather the necessary tools for the installation process. Typical tools required include a screwdriver, drill, tape measure, and possibly a level. Having these tools ready beforehand will make the installation process more efficient and hassle-free.
Locate the Thermostat Wires
Locate your current thermostat and take note of the wires connected to it. Labeling these wires based on their corresponding terminals (e.g., Rh, W, Y, G) will help simplify the installation of the new smart thermostat later on. This step prevents confusion and ensures a correct connection.
Turn Off Power
Before beginning the installation, it’s crucial to turn off the power to your HVAC system to avoid any electrical mishaps. Locate the circuit breaker associated with your heating and cooling system and switch it off to cut off power supply completely.
Prepare the Mounting Area
Clear the area around your current thermostat to prepare for the installation of the new smart thermostat. Ensure there are no obstacles hindering the process and that the wall or surface where the thermostat will be mounted is clean and suitable for installation.
By following these pre-installation preparations carefully, you’ll set yourself up for a successful installation of your smart thermostat. These initial steps are essential for a smooth transition to a more convenient and energy-efficient home temperature control system.
Steps to Install a Smart Thermostat
Now that you’ve prepared for the installation, let’s walk through the steps to install your new smart thermostat without any hassle.
- Switch Off Power: Before starting, ensure your HVAC system is powered off. Head to your electrical panel and switch off the circuit that powers your heating and cooling system. This step is crucial for your safety throughout the installation process.
- Remove Old Thermostat: Take off the cover of your existing thermostat and unscrew it from the wall. Carefully disconnect the wires from the old thermostat. Remember to label each wire according to its terminal to simplify the installation of the new thermostat.
- Install Mounting Plate: If your smart thermostat comes with a mounting plate, attach it to the wall using the provided screws. Make sure it is level to ensure the thermostat sits correctly on the wall.
- Connect Wires: Match the labeled wires from your HVAC system to the corresponding terminals on the new smart thermostat. Follow the manufacturer’s instructions to connect the wires securely.
- Attach Thermostat to Mounting Plate: Gently push the wires back into the wall opening. Align the smart thermostat with the mounting plate and carefully secure it in place. Double-check that it is level to avoid any issues with functionality.
- Power Up and Test: Restore power to your HVAC system by switching the circuit back on. Follow the setup instructions provided by the manufacturer to connect your smart thermostat to your Wi-Fi network and configure its settings. Test the thermostat to ensure it’s functioning correctly and communicating with your heating and cooling system.
- Download the App: Many smart thermostats come with companion apps that allow you to control the device remotely. Download the app onto your smartphone or tablet and follow the instructions to link it to your thermostat. This enables you to adjust temperatures and set schedules from anywhere.
You’re all set! You’ve successfully installed your smart thermostat and are now ready to enjoy the convenience and energy savings it brings to your home.
Recommended Products

Specifically designed to work with ecobee Smart Thermostat Essential only. Does not work with other ecobee Smart Thermostat models

Perfect Fit -- The Smart Thermostat Trim Kit is specifically engineered for seamless compatibility with ecobee Smart Thermostat Essential, providing a clean solution to conceal old wiring and wall imperfections while maintaining a polished look.

Original Replacement Part
Troubleshooting Common Installation Issues
When installing your smart thermostat, you may encounter some common issues that could disrupt the process. Here are some troubleshooting tips to help you address these challenges:
Recommended Products
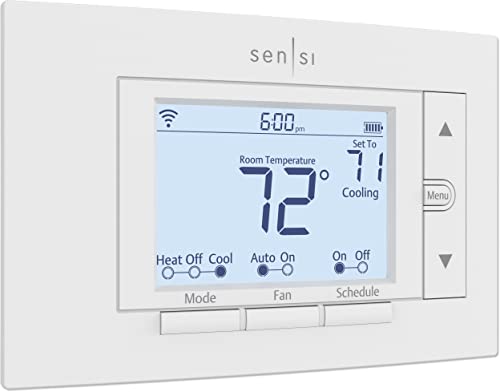
PRIVACY PROTECTION*: Sensi won’t sell your personal information to third parties

COMFORT COMES IN YOUR COLOR. Personalize your Wi-Fi Smart Color Programmable Thermostat to fit your décor.

High use of the scheduling feature of the T5 thermostat saved customers between 8 and 16% on heating and cooling bills. Dollar savings range based on nationwide average annual single-family detached home's heat and cooling bills; actual savings varies based on consumption.
Issue 1: Wi-Fi Connectivity Problems
If you’re facing connectivity issues with your smart thermostat, ensure that your Wi-Fi network is stable and compatible with the device. Follow these steps:
- Check Wi-Fi Signal: Position your thermostat within the range of your Wi-Fi router for a strong signal.
- Reset Wi-Fi: Restart your Wi-Fi router and try reconnecting the thermostat to the network.
- Double-Check Password: Ensure you’ve entered the correct Wi-Fi password during setup.
Issue 2: Compatibility Errors
In case your smart thermostat is not compatible with your HVAC system, follow these steps:
- Review Compatibility: Double-check the thermostat’s compatibility with your heating and cooling system.
- Consult Manual: Refer to the user manual or contact customer support for specific compatibility details.
Issue 3: Wiring Problems
Wiring issues can also hinder the installation process. Here’s how you can troubleshoot wiring problems:
- Verify Wiring Setup: Make sure the wires are correctly connected to the terminals on the thermostat.
- Inspect Wiring: Check for any loose or damaged wires that may be affecting the system’s functionality.
Issue 4: Error Messages
Error messages on your smart thermostat can indicate underlying issues. Follow these steps to troubleshoot:
- Decipher Error Codes: Refer to the user manual to understand what the error messages mean.
- Restart Device: Try restarting the thermostat to see if the error clears.
Issue 5: Power Interruptions
If your thermostat loses power during installation, take the following steps:
- Check Power Source: Ensure the power source is stable and uninterrupted.
- Reconnect: Reconnect the thermostat following the installation steps to restore power.
By troubleshooting these common installation issues, you can ensure a successful setup of your smart thermostat for efficient and convenient temperature control in your home.
Best Practices for Maintaining Your Smart Thermostat
Regular Maintenance Checks
To ensure your smart thermostat functions optimally, perform routine maintenance checks. It’s crucial to keep your device clean and free of any dust or debris. Regularly inspect the thermostat for any physical damage, such as cracks or signs of wear and tear. Cleaning the thermostat also helps maintain its responsiveness and accuracy.
Software Updates
Stay proactive by updating your smart thermostat’s software regularly. Manufacturers release updates to enhance performance, fix bugs, and introduce new features. These updates can improve your thermostat’s functionality and efficiency. Check for updates through the manufacturer’s app or website, and follow the instructions to install them.
Battery Replacement
If your smart thermostat uses batteries, monitor their status and replace them when necessary. Low batteries can cause connectivity issues or lead to malfunctions. Keep spare batteries on hand to ensure uninterrupted operation. Refer to the manufacturer’s guidelines for the correct battery type and replacement procedure.
Check Sensor Calibration
Periodically check the sensor calibration to guarantee accurate temperature readings. Incorrect sensor readings can result in inefficient heating or cooling. Follow the manufacturer’s recommendations for calibrating the sensor or consult professional technicians for assistance if needed.
Wi-Fi Connection
A stable Wi-Fi connection is vital for remote access and control of your smart thermostat. Ensure your Wi-Fi network is reliable and secure to prevent connectivity issues. If you encounter connectivity problems, troubleshoot your network or seek assistance from the manufacturer’s support team.
Professional Maintenance
Consider scheduling professional maintenance for your smart thermostat at regular intervals. Professional technicians can conduct thorough inspections, recalibrations, and system checks to maintain peak performance. Professional servicing helps prevent potential issues and ensures your thermostat operates efficiently.
By following these best practices for maintaining your smart thermostat, you can prolong its lifespan, maximize its performance, and enjoy consistent comfort and energy savings in your home.
Conclusion
That’s it! By following these steps, you’re all set to enjoy the convenience and energy savings that come with your new smart thermostat. Remember to keep up with regular maintenance to ensure it continues to work efficiently. With remote temperature control and integration with your smart home system, you’ll experience a new level of comfort and convenience. Enjoy the benefits of a smart thermostat in your home!
Frequently Asked Questions
Why should I consider switching to a smart thermostat?
Switching to a smart thermostat allows remote temperature control, improves energy efficiency, and seamlessly integrates with smart home systems.
What are the essential pre-installation preparations for a smart thermostat?
Prior to installation, ensure compatibility, a stable Wi-Fi connection, gather tools, locate wires, and prepare the mounting area for a hassle-free installation process.
How can I maintain my smart thermostat for optimal performance?
Maintain your smart thermostat by regularly checking and cleaning it, ensuring software updates, monitoring battery levels, calibrating sensors, maintaining a stable Wi-Fi connection, and considering professional maintenance when necessary.