Do you ever find yourself constantly adjusting your smart home devices as you come and go? Picture this: You’re rushing out the door, wondering if you remembered to turn off the lights or adjust the thermostat. What if there was a way to automate these tasks seamlessly based on your location?
In this article, you’ll discover the power of setting up geofencing with HomeKit. Imagine arriving home to a perfectly lit and cozy space without lifting a finger. By leveraging geofencing technology, you can enhance your home automation experience and simplify your daily routine. Ready to unlock the convenience and efficiency of geofencing with HomeKit? Let’s get started.
Key Takeaways
- Geofencing with HomeKit allows for automation of smart home devices based on geographical location, enhancing convenience and efficiency.
- Setting up geofencing in HomeKit involves creating virtual boundaries, defining triggers, and assigning actions within the Home app.
- Troubleshooting geofencing issues in HomeKit involves checking location services settings, home hub connectivity, verifying automation settings, restarting devices, updating software, and resetting location data if needed.
- Best practices for geofencing in HomeKit include ensuring location accuracy, optimizing automation triggers, maintaining consistent hub connectivity, having backup plans for failures, and periodically reviewing settings for accuracy.
Understanding Geofencing for HomeKit
Geofencing is a smart technology that allows your devices, such as your iPhone, to trigger actions based on your geographical location. With HomeKit, Apple’s smart home platform, you can leverage geofencing to automate tasks in your home.
Geofencing in HomeKit works by defining virtual boundaries, or “geofences,” around specific locations. When you cross these boundaries, your devices can detect your movements and trigger pre-defined actions. For instance, you can set up your lights to turn on automatically as you approach home or adjust the thermostat when you leave for work.
Geofencing eliminates the need for manual control of smart home devices, making your life more convenient and efficient. By integrating geofencing into your HomeKit setup, you can create personalized automation that aligns with your daily routines and preferences.
To utilize geofencing with HomeKit effectively, you first need to ensure that your Apple devices are connected to the same iCloud account and that location services are enabled. Additionally, setting up specific scenes or automations within the Home app will allow you to link geofencing triggers to desired actions seamlessly.
By understanding the fundamentals of geofencing for HomeKit, you can transform your living space into a more intelligent and responsive environment. Experiment with different automation settings to tailor your smart home experience to meet your needs effortlessly. Start exploring the world of geofencing with HomeKit today for a smarter, hassle-free lifestyle.
Setting Up Geofencing in HomeKit
To set up geofencing in HomeKit seamlessly, follow these straightforward steps:
- Access Home Settings: Open the Home app on your iOS device.
- Select Home Settings: Tap on the home icon in the top left corner to access Home Settings.
- Enable Location Services: Ensure that Location Services are turned on for the Home app. Go to your device’s settings, select Privacy, then Location Services, and enable it for the Home app.
- Create a Home: If you haven’t set up a Home yet, tap on the “+” icon and follow the prompts to create one.
- Add Automation: Tap on Automation in Home Settings, then click the “+” icon to add a new automation.
- Choose People: Select “People Arrive” or “People Leave” based on your preference and who you want the automation to apply to.
- Select Triggers: Define the specific triggers that will activate the automation. For geofencing, choose “When the First Person Arrives” or “When the Last Person Leaves.”
- Assign Actions: Specify the actions you want HomeKit to perform when the triggers are activated. This could include adjusting lights, thermostats, locks, or other smart devices in your home.
- Set Locations: Enter the location details where the automation applies. You can customize the radius of the geofence to trigger the actions.
- Save and Activate: Once you’ve set up all the parameters, save your automation. Make sure to enable it for it to function correctly.
By following these steps, you’ll effectively configure geofencing in HomeKit, allowing for automated actions based on your location for a more seamless smart home experience.
Remember, geofencing in HomeKit offers you the convenience of hands-free control over your smart devices, making your life easier and more efficient.
Recommended Products
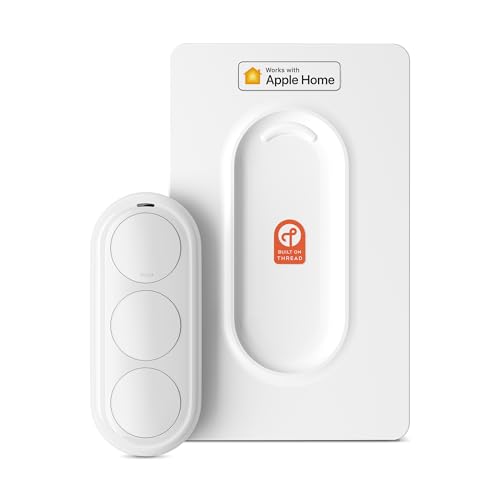
Click. Trigger. Done. —— Take control of all your Apple Home (HomeKit) accessories in the palm of your hand. With a 3-button design, you can trigger up to 9 different automations - from simple actions like turning on/off a group of lights to advanced scenes such as Arrive Home, where your garage door opens, lights turn on, music starts playing, and curtains draw automatically. Each button supports single click, double click, and long press, giving you effortless control for any occasion

【Apple Homekit Support】This Apple HomeKit compatible smart plug fully integrates into your Apple ecosystem, just ask Siri to turn on/off the devices in your home. (Apple HomeKit remote control requires an additional networked Apple device at home such as an iPad, HomePod or Apple TV.)
Troubleshooting Geofencing Issues
If you’re encountering issues with your geofencing setup in HomeKit, don’t worry; we’ve got you covered with some troubleshooting tips that can help resolve common problems. Here are some steps to address any geofencing issues you may be facing:
Recommended Products

[Multi-Protocol Hub with Matter Bridge] The M3 is a versatile hub supporting Aqara Zigbee and Thread devices. It integrates third-party devices into the Aqara Home app. Supports advanced Matter bridge functionality, enabling Aqara-exclusive scenes and signals to sync with Matter ecosystems such as Home Assistant for seamless integration. Supports up to 127 Aqara Zigbee devices (** Not third-party Zigbee devices) and 127 Thread devices (Repeaters are needed).
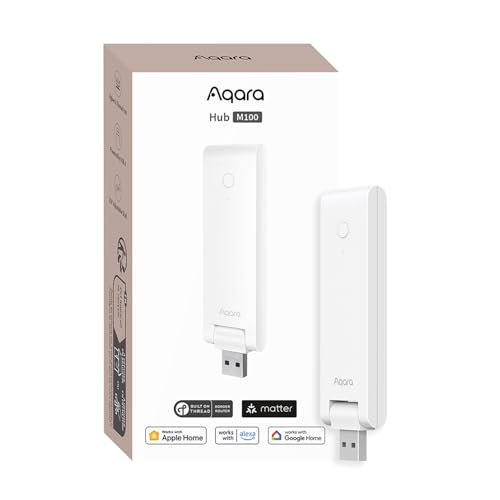
Multi-Protocol Smart Hub with Matter Bridge – The M100 is a versatile smart hub compatible with Thread devices and Aqara Zigbee (** Not third-party Zigbee devices), supporting up to 20 Aqara Zigbee devices and 20 Thread devices. As a Matter Bridge, it connects Aqara Zigbee products to other smart home ecosystems, compatible with Apple Home, Amazon Alexa, Home Assistant, etc. Note: Use a 5V⎓0.5A power adapter (not included) and keep the product continuously powered during use.

POWERFUL SMART HOME PERFORMANCE - EVEN WITHOUT INTERNET Hubitat C-8 Pro runs automations inside your home instead of on remote servers. Lights, locks, thermostats and other smart home devices and security rules continue working during internet outages - delivering faster response, greater reliability and enhanced privacy.
Check Location Services Settings:
- Ensure that Location Services are enabled on your iOS device for the Home app.
- Go to Settings > Privacy > Location Services and verify that Location Services are turned on for the Home app.
Confirm Home Hub Connectivity:
- Make sure your Home Hub, such as an Apple TV or HomePod, is connected to the same Wi-Fi network as your iOS device.
- Check that your Home Hub is set up correctly and functioning properly to support geofencing automation.
Verify Automation Settings:
- Open the Home app on your iOS device and navigate to the Automation tab.
- Double-check your automation settings to ensure that triggers, actions, and locations are configured accurately.
- Edit or recreate the automation if you suspect any errors in the setup.
Restart Devices:
- Sometimes, a simple restart can resolve connectivity issues.
- Restart your iOS device, Home Hub, and any other devices involved in your HomeKit setup.
- After restarting, check if the geofencing automation works as intended.
Update Software:
- Ensure that your iOS device, Home Hub, and HomeKit-enabled accessories are running the latest software updates.
- Go to Settings > General > Software Update to check for and install any available updates.
- If geofencing inaccuracies persist, you can reset the location data in the Home app.
- Go to Settings > Privacy > Location Services > System Services > Significant Locations, and reset the location history.
By following these troubleshooting steps, you can effectively address common geofencing issues in HomeKit and ensure a seamless and reliable automation experience tailored to your location. Remember to double-check your settings, connectivity, and software updates to optimize your geofencing setup for smart home convenience.
Best Practices for Geofencing in HomeKit
To enhance the efficiency of geofencing in your HomeKit setup, follow these best practices:
Recommended Products

Click. Trigger. Done. —— Take control of all your Apple Home (HomeKit) accessories in the palm of your hand. With a 3-button design, you can trigger up to 9 different...
Ensure Location Accuracy
- Confirm that your HomeKit location settings are accurate.
- Avoid virtual boundary overlap to prevent conflicting triggers.
Optimize Automation Triggers
- Use specific triggers like “Arrival” or “Departure” for precise actions.
- Combine multiple triggers for customized automation sequences.
Consistent Hub Connectivity
- Ensure your Home Hub, like an Apple TV or iPad, has stable connectivity for geofencing to function properly.
- Keep your hub updated to maintain seamless automation.
Backup Plans for Failures
- Have manual override options in place in case geofencing malfunctions.
- Create backup trigger mechanisms for critical actions.
- Periodically review your geofencing settings for accuracy.
- Test automation sequences to confirm they trigger as intended.
By implementing these best practices, you can optimize your geofencing experience in HomeKit for a reliable and personalized smart home automation setup tailored to your location.
Conclusion
That’s it! By optimizing your geofencing setup in HomeKit with the best practices shared in this article, you’re on your way to a seamless and efficient smart home automation experience. Remember to prioritize location accuracy, fine-tune your automation triggers, ensure stable hub connectivity, have contingency plans in place, and regularly review and test your geofencing settings. These simple steps will help you make the most of geofencing technology, allowing you to enjoy a more tailored and reliable smart home setup that adapts to your movements. Get started on enhancing your smart home automation with geofencing in HomeKit today!
Frequently Asked Questions
What is geofencing with HomeKit and why is it convenient for smart home automation?
Geofencing with HomeKit involves defining virtual boundaries to trigger actions based on your location. It eliminates manual control of smart home devices as you move within these boundaries, offering efficient and convenient automation.
What are the best practices for optimizing geofencing in HomeKit?
Optimizing geofencing in HomeKit involves ensuring location accuracy, setting up automation triggers effectively, maintaining hub connectivity, creating backup plans for failures, and regularly reviewing and testing geofencing settings.
How can users enhance their geofencing experience in HomeKit for a more personalized smart home automation setup?
By following the best practices mentioned, users can enhance their geofencing experience in HomeKit, leading to a more reliable and personalized smart home automation setup tailored to their location.