

A whole-home makeover fails most often because it tries to be a single event. Paint, furniture, lighting, storage, and “a new look” get bundled into one weekend, one shopping trip, or one credit-card bill. The house ends up half-done in every room and finished in none.
This guide is a planning sequence for people who live in the house while they change it. It is not a contractor bid, a design-firm process, or a smart-device rollout. Use it to decide what to touch first, what to leave alone, and how to keep one room from stealing the budget meant for the next.
For money order, see where to spend first. For the traps that waste that money, use room makeover mistakes. Room-level examples live under the existing Smart Home Makeover section.
Write the house’s jobs before you write a shopping list
Walk the house at the hours you actually use it: weekday morning, after-school scramble, and the first hour after dinner. Note where bags land, where light is missing, where two people cannot pass, and which room you avoid. Those notes beat a mood board.
Most homes have four or five real jobs: cooking and cleanup, sitting after work, sleeping, getting out the door, and a catch-all for laundry or homework. A makeover that ignores those jobs will look finished in photos and still feel broken at 7 p.m.
Name one primary job per room. A living room that must also be a playroom, guest bed, and hallway will never look “done.” You can still improve it, but you have to pick which job wins the center of the floor.
Measure once so you do not buy twice
Record the long wall and short wall of each room you might touch this year. Measure door swings, radiator depth, and the sofa or table you already own. Write the numbers on a single sheet so they travel to the store with you.
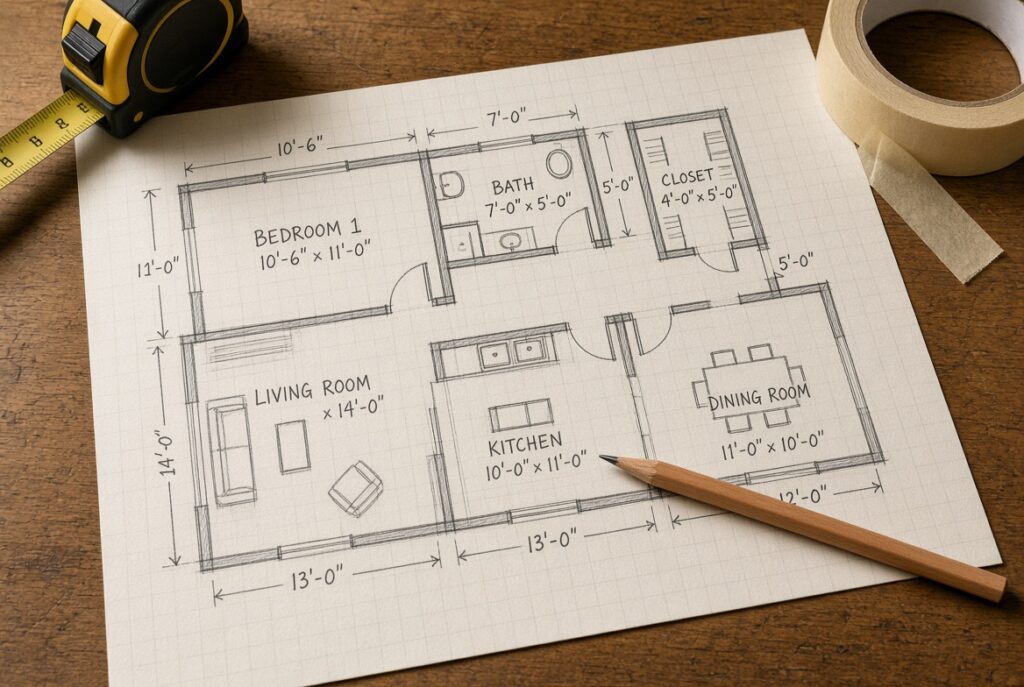
Blue painter’s tape on the floor is more honest than an online dimension chart. Tape the footprint of a table, a dresser, or a runner and live with it for two days. If you keep stepping over the tape, the piece is too big for that path.
Do not start with demolition. Start with paths. A house feels better when people can walk from the door to the kitchen without sidestepping a chair. That is a makeover even if no wall color changes.
Pick one room that will teach you the rest
The first room should be used every day and small enough to finish. Entry, living room, or the bedroom you actually sleep in are better first rooms than a basement you visit twice a month. Finishing one room builds judgment: how long paint takes, how much a rug changes the floor, how fast clutter returns.
If the house feels chaotic at the door, start with the entry. If evenings feel harsh and scattered, start with the living room. If sleep is the thing that is failing, start with the bedroom and leave the public rooms for later. The living room makeover and bedroom makeover archives are useful once you have chosen the room, not before.
Write a one-page brief for that room: job, path that must stay clear, light problem, storage problem, and a spending cap. Tape it to the fridge if that keeps you from adding a seventh task mid-weekend.

Sequence the work so rooms do not fight each other
Do shared decisions early and local decoration late. Shared decisions are the ones that show from more than one doorway: floor color temperature, the metal on visible hardware, the white or off-white on trim, and the warmth of bulbs. If the living room goes cool gray and the dining room goes cream, the house will feel stitched together even after both rooms are “finished.” The cohesion guide, room by room, covers how to keep those shared choices quiet.
A practical order for most lived-in houses:
- Clear paths and overflow. Donate or box what does not belong in the first room.
- Fix light. Swap harsh cool-white bulbs and add one lamp where people sit or cook. See how lighting changes a room.
- Repair the cheap failures: dripping faucet, dead outlet plate, door that does not latch. These are not glamorous and they reset how the house feels.
- Paint only after you know the furniture stays. Paint around a sofa you plan to replace is wasted labor.
- Rugs, curtains, and storage that hide daily mess.
- New furniture last, and only for the piece that is actually failing.
Stop after each step and use the room for a week. If the path is clear and the light is decent, you may not need the later steps in that room this year.
Budget in layers, not in one number
Split money into three buckets: keep-the-house-working, change-how-the-room-feels, and replace-a-major-piece. Put most of the first year into the first two. A new sofa in a dark, cluttered room still sits in a dark, cluttered room.
Give the first room a hard cap and a “not this year” list. The not-this-year list is how you protect the next room. If the living room eats the kitchen lighting budget, the house will look styled in one place and neglected in the place you stand every morning.
Cheap does not mean temporary. A $20 bulb change and a $40 hook rail can last years. A $15 trend object rarely does. The cheap room makeover category is full of historical examples; use it for scale, not as a checklist to copy item for item.
Decide what “done” means for this year
Done is not a magazine spread. Done is: the path is clear, two people can sit without moving furniture, the evening light is usable, and there is a home for the objects that used to live on the floor. Write those tests down. When the room passes them, stop shopping.
Photograph the room at night, not only at noon. Night is when most living rooms and kitchens are judged. If the photo looks cold, the next lever is usually light or surface clutter, not another pillow.
Leave a written note for the next room: what you would repeat, what you overbought, and which shared color or metal you already committed to. That note is the whole-home plan. You do not need a binder.
When to bring in help, and when not to
Call a licensed person for gas, major electrical, structural changes, and water that is not a simple aerator swap. This publication is not a substitute for that work. Paint, lamps, hooks, rugs, and furniture placement are ordinary home tasks if you are willing to live with the mess for a weekend.
Do not hire a full redesign if you have not yet used the room after a light and path pass. Many “we need a designer” problems are a sofa in the walking lane and a single ceiling disc.
A 90-day plan that stays small
Days 1 to 7: measure, tape footprints, write the four-line list, and finish the path in one room.
Days 8 to 30: light and cheap repairs in that room only. Live with it.
Days 31 to 60: paint or textiles if the room still fails the night test. Keep receipts in one envelope.
Days 61 to 90: either stop, or start the next room with the same brief. Do not open a third room while the second is in boxes.
If you rent, skip paint unless your lease allows it. Hooks with proper anchors, plug-in lamps, a rug, and a better shower curtain still count as a makeover. The small upgrades guide is built for that constraint.
How this hub is meant to be used
Use this page as the map. Then go to the resource that matches the current failure: spending order, mistakes, lighting, small upgrades, or visual cohesion. If you already know the room, use the child pathways on the makeover hub for kitchen, living room, bedroom, small rooms, and before-and-after examples. Do not read all of them first. Finish one room.
What a room-by-room year can look like
January and February are good for measuring, lighting, and the entry. You are home more after dark, so bad light is obvious. March and April work for paint if you can open windows. Summer is a poor time to start a bedroom if that is the only air-conditioned room. Fall is a good time for textiles and the living room you will sit in all winter.
That calendar is a suggestion, not a rule. The rule is still one room to a usable finish before the next room loses its floor. If a holiday will dump guests into the living room in four weeks, do not open the walls. Do the path, the lamps, and the table. Save paint for January.
If you rent, write the reversible list first: lamps, rugs, curtains on a tension or existing rod, hooks that you can patch, a shower curtain, furniture placement. Ask before painting. Keep photos of the original walls. None of that makes the work less of a makeover. It just keeps the deposit.
If you own, still resist the urge to open a wall in month one. Live with the measured plan. Many “we should knock through” ideas fade after the walking lane is cleared and the light is fixed.
If you share the house, agree on the first room and the cap out loud. Unilateral paint in a shared living room is how makeovers become arguments. Put the four-line list where everyone can see it.
Questions that keep the plan honest
What fails on a rainy Tuesday, not on a Saturday of nesting? Which room would you be embarrassed to leave a guest in for ten minutes? Which purchase from last year did you not use? Those answers are the plan. Saved photos of other people’s kitchens are not.
When you stall, return to the makeover hub and pick the next resource by failure type, not by mood.
